TGIF Network - Account Setup
The new server is temporarily being hosted at https://tgif.network. This will be replacing
the normal tgif.network location once the beta period is over and the code has been polished.
Because it is on a different server this means you will need to configure your hotspot to connect
there. The method described in this document will temporarily connect your repeater or hotspot to
the tgif network using the new security method (similar to BrandMeister’s hotspot security
feature).
In the new network implementation there are two modes of joining the server with your hotspot.
The method which uses the default dmr password ‘passw0rd’ is called a ‘Legacy Connection’. In
addition to this, there is now an alternative type of connection which we call a ‘Secured
Connection’. The secure type connection involves a station creating an account on the tgif website
(currently at tgif.network) and verifying their email and account which will then give the
ability to generate a secure dmr network connection password which is unique for that user and will
be configured into the hotspot along with their dmr id. Both implementations will be supported,
which means you will always be able to connect the “legacy” way which is what everyone is used
to now, although during the beta period these types of connections have been disabled. This means
if you want to help beta test you will need to register for an account and get your secure login
credentials.
1
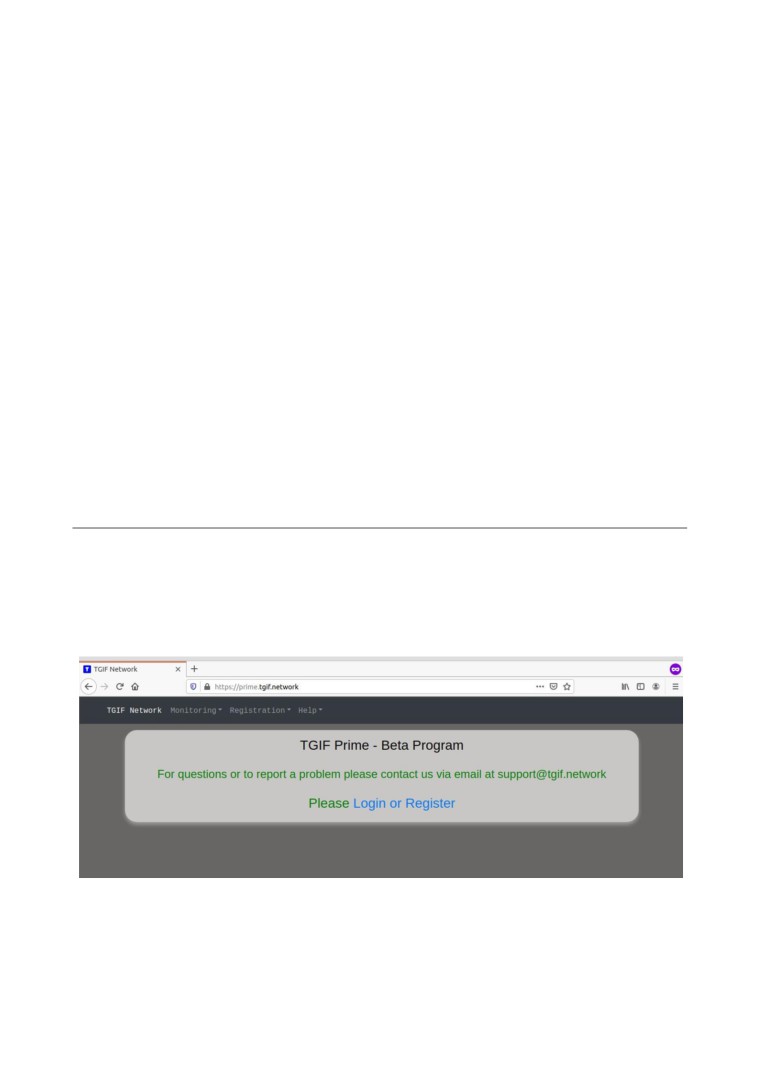
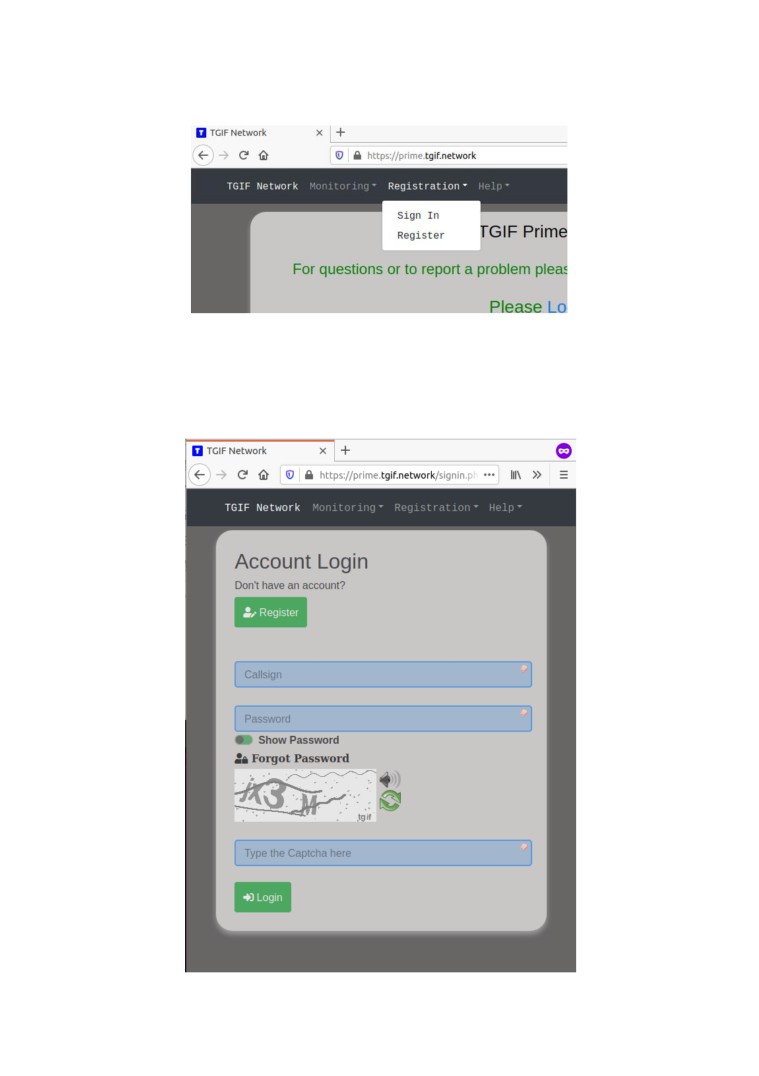
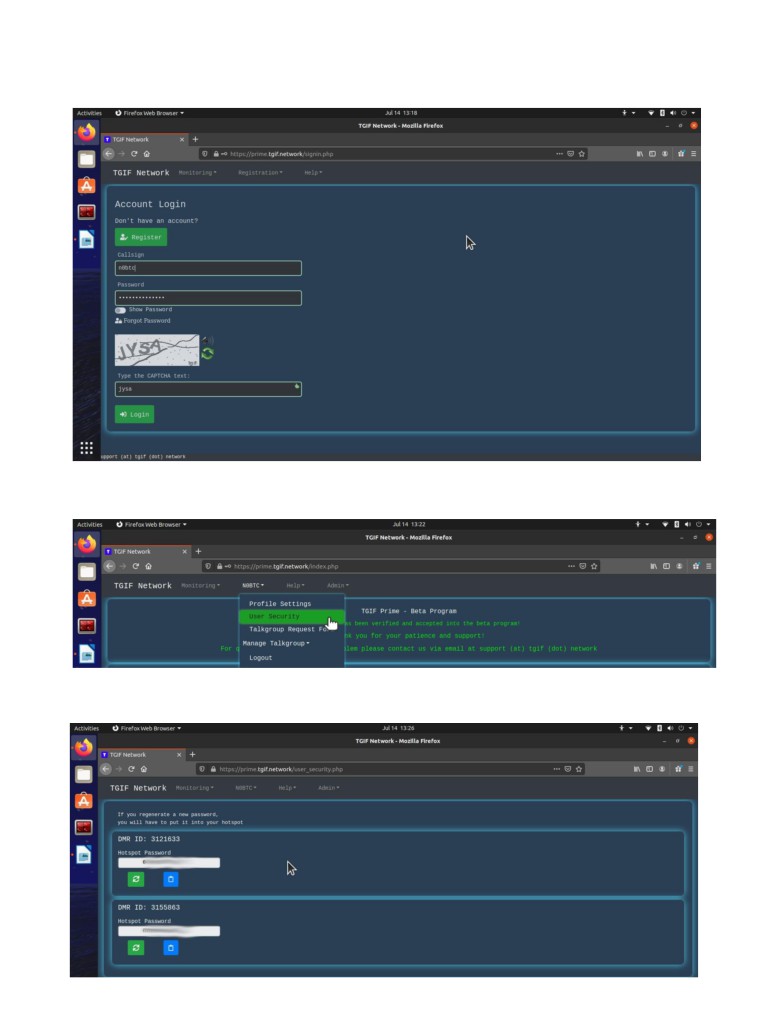
Now, either click the ‘Login or Register’ hyperlink in the center of the page, or click the
“Registration” dropdown menu and click Register.
If you already have an account, go ahead and just login with your CALLSIGN and account
password here. If you have issues verifying your email or have any other questions, please send
account click the green ‘Register’ button at the top left of the page.
2
Fill out the registration form on this page and submit it. You should receive an email containg a
link you can click to verify your account. Make sure to check your spam folders and trash and
wait at least 10 minutes if you do not see the email immediately. If you still do not receive the
your account for you.
3
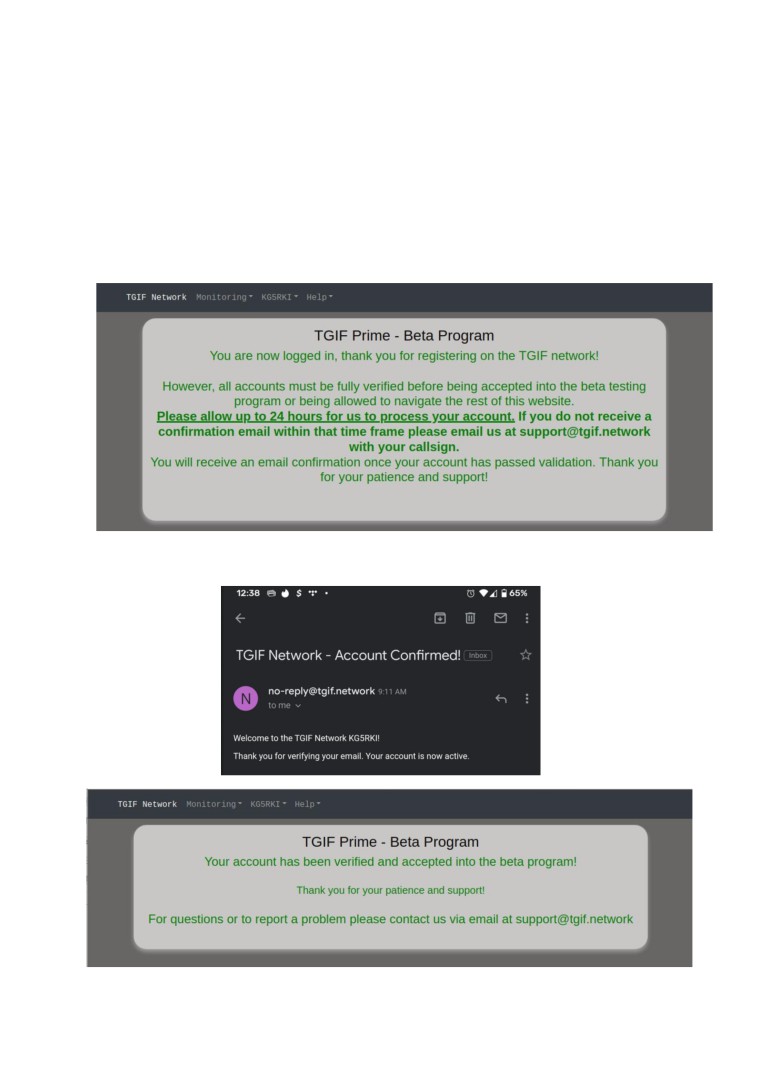
After you click the verification url in the email it should bring you back to the sign in page. You
may now login using your CALLSIGN (not your email) and account password then entering the
captcha text and clicking the ‘Login’ button. If you encounter any problems, email us at
you should be redirected to the main page and displayed will be one of two messages. For most
people your account will be verified almost immediately, but for some it may take up to 24 hours. If
it takes longer than that please send us an email.
Once your account becomes fully verified, you will receive a confirmation email and when you
visit the website you should see a different message and be able to navigate the full website.
4
Setting Up Your Hotspot
Now that you have completed registration and your account is verified let’s get your hotspot set up on
the network. Setup by step instructions and screenshots will be provided to make this process as simple
as possible. The two major types of hotspots will be covered. You can always email
support@tgif.network if you need assistance.
1) The Common Stuff
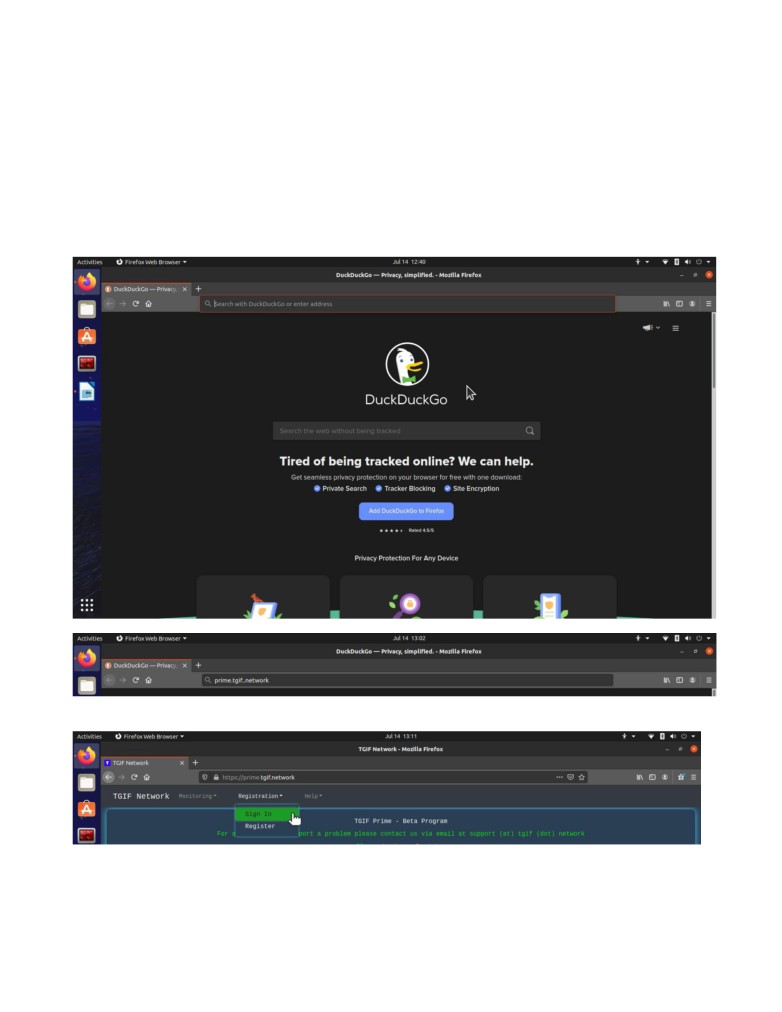
Step 1: open your web browser and navigate to tgif.network from your address bar.
Step 2: once the page loads click or tap the Registration drop down menu and click Sign In
5
Step 3: once the Sign In page loads enter your callsign and password.
NOTE: Do NOT use your email address. ONLY use your callsign.
Enter the captcha and click or tap the “Login” button
Step 4: Click or tap your callsign followed by “User Security”
Step 5: once the User Security page loads click or tap the blue clipboard under your DMR ID. This will
coppy the long password above to your sysem clipboard.
6
2) Pi-Star Specific (skip if using Openspot)
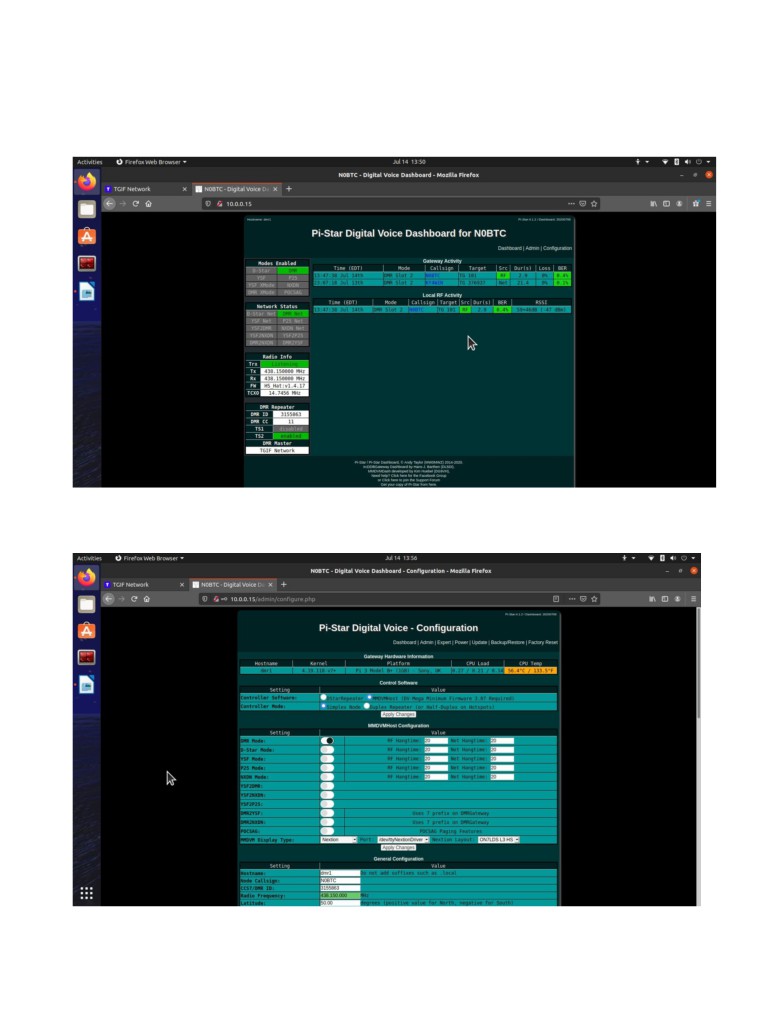
Step 1: load the pi-star dashboard by using its IP address
NOTE: in my case this is 10.0.0.15 but it will be different for you.
NOTE 2: I have changed my colors by default it is a white page with red banners at the top and bottom.
Step 2: Click or tap Configuration and if required to login enter pi-star as the username and raspberry
as the password
NOTE: these are the defaults
7
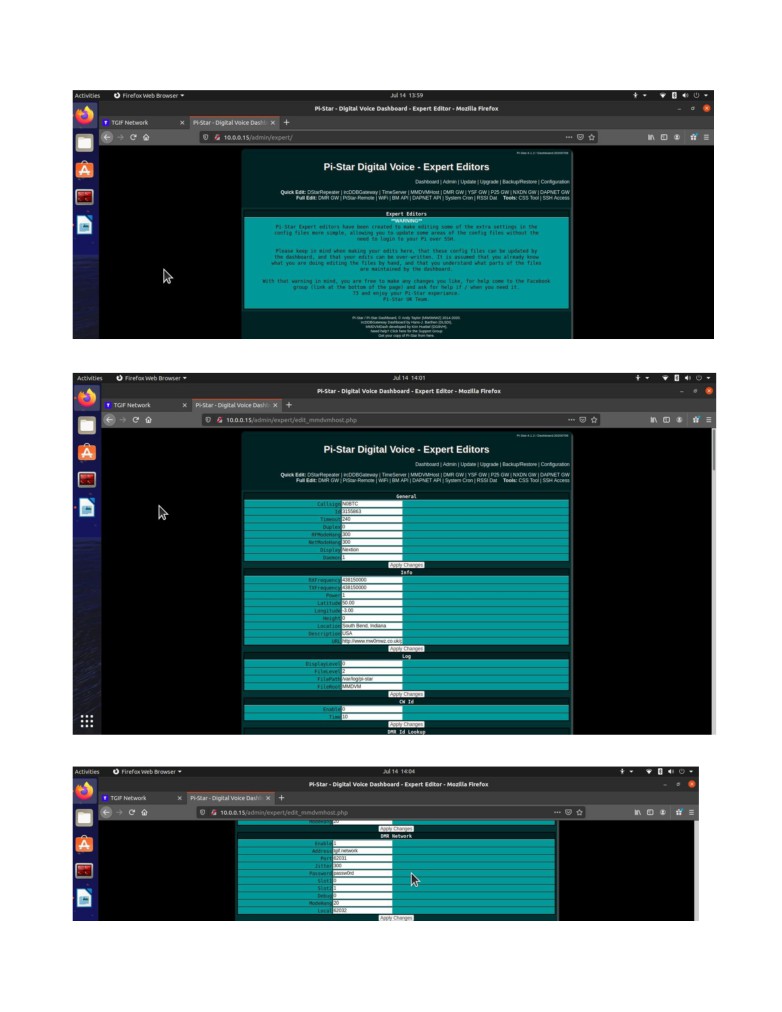
Step 3: Click or tap Expert near the top right hand corner of the page
Step 4: Click or tap MMDVMHost
Step 5: scroll down to the DMR Network section
8
Step 6: change the Address box from tgif.network to tgif.network
Step 7: right-click or tap and hold on the password box and past the password that was coppied to
your clipboard earlier.
Step 8: once the password is pasted click Apply Changes and you are done.
NOTE: the configuration page shown in Step 2 above will now say DMRGateway under the DMR
Configuration section. That is normal.
NOTE2: if you make any changes on the configuration page you will need to follow this guide again.
3) Openspot Specific
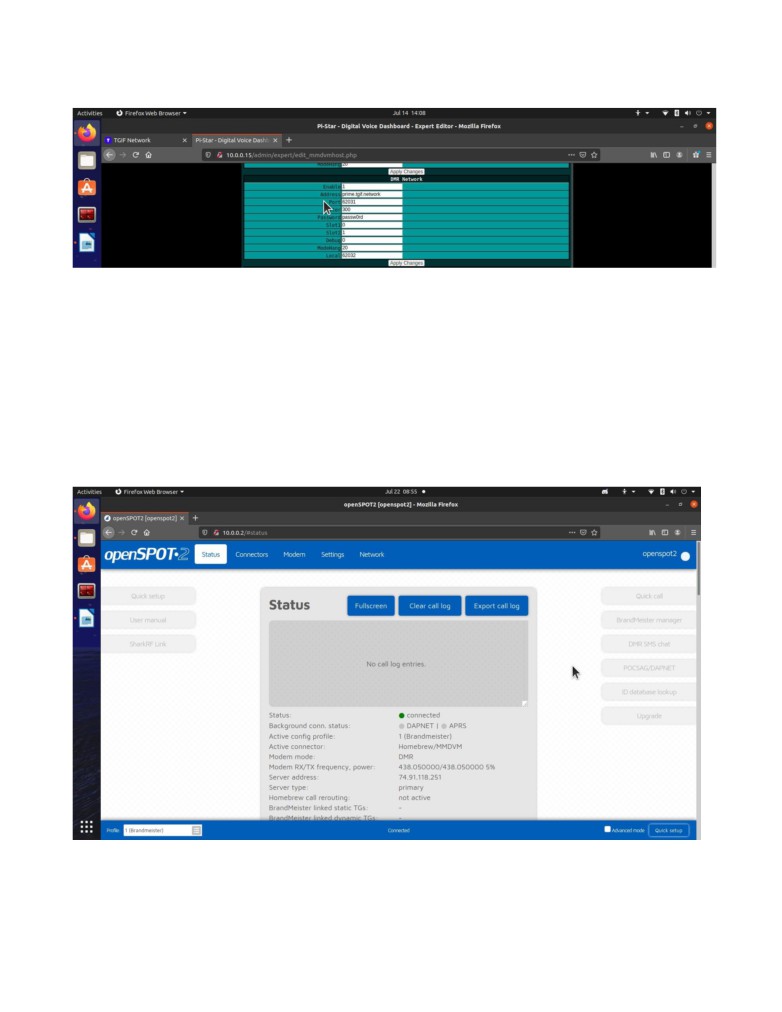
Step 1: load the Openspot dashboard from it’s IP or openspot#.local (example openspot2.local or
openspot3.local)
NOTE: here I used the IP address 10.0.0.2. This will be different for you.
9
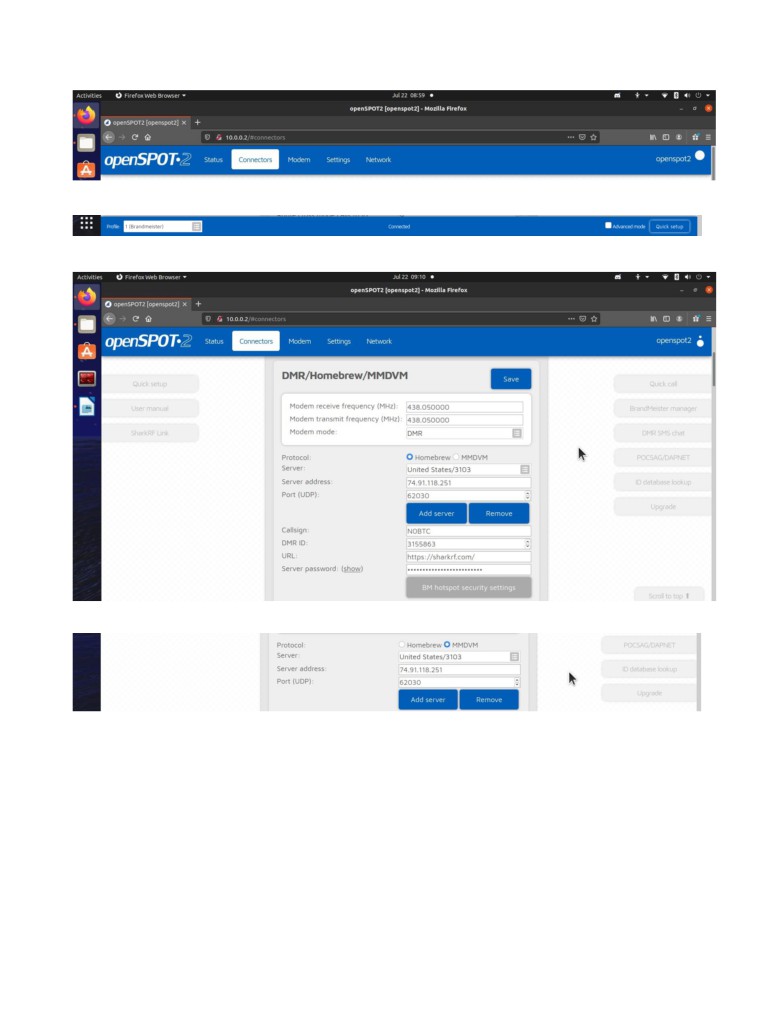
Step 2: click the Connectors page
Step 3: Check the Advanced checkbox near the bottom right of the page
Step 4: scroll to the DMR/Homebrew/MMDVM section
Step 5: change the Protocol radio button from Homebrew to MMDVM
10
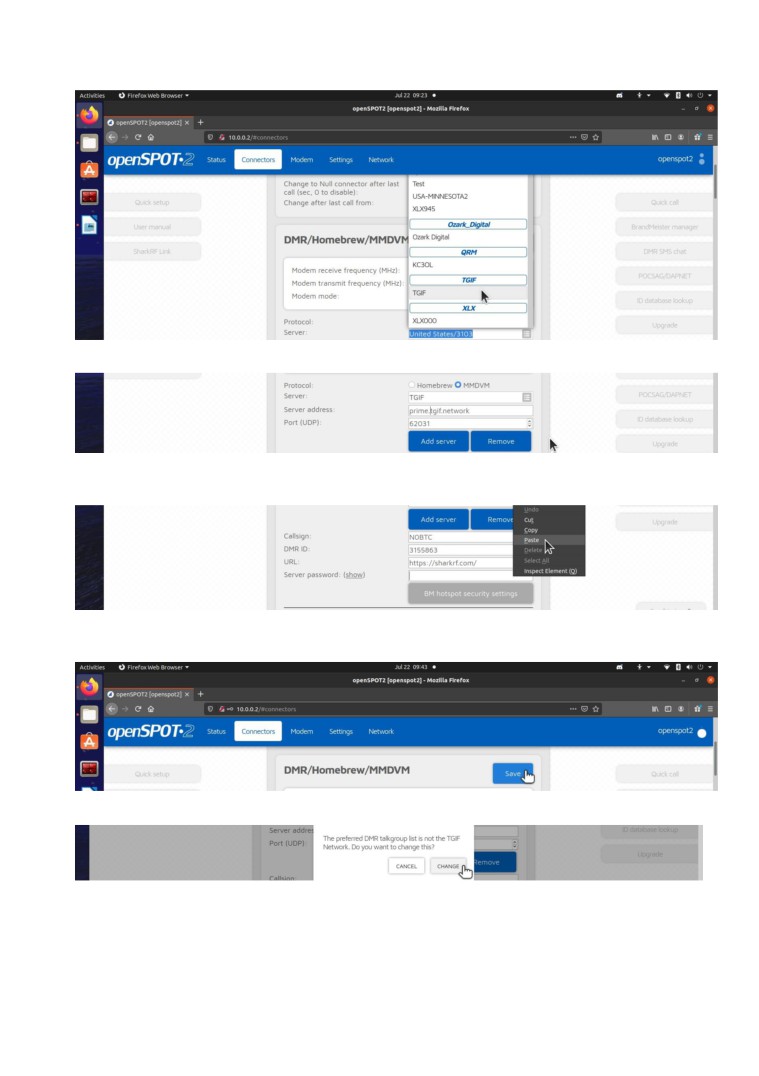
Step 6: click the server box and scroll down the list to choose TGIF
Step 7: change the server address from tgif.network to tgif.network
Step 8: delete the password that is in the Server Password box and right-click and paste in the
password you copied in The Common Stuff: Step 5
Step 9: once the password has been pasted click the Save button to the right of
DMR/Homebrew/MMDVM
Step 10: Click the Change button to change the list of talkgroups to the TGIF list
Hopefully this guide has been helpful. If you have any questions or need any help feel free to send an
11
Be aware that the TGIF site is just a temporary holding place for beta testing the new
system. Once the beta period is over it will take the place of tgif.network and the prime page will
appear when you visit tgif.network and all hotspots connected to that server will automatically
connect to the new system. If you are still on the old system and not prime when this happens, you
do not need to do anything, your hotspot will automatically connect to the new system. Thank you
for participating in the beta test, we appreciate your patience while we have been developing this.
We hope you enjoy it.
-TGIF Network Support Team
12